Editing A Chapter Website
Quick note before diving in:
Two names you’ll see going forward are WordPress and Gutenberg.
All you need to know is that the chapter websites are built using WordPress, a content management system, which allows those with no coding experience to editing websites, and post new content (like Facebook).
And, Gutenberg is the new text editor/page-builder that WordPress uses.
Logging In
There are 3 ways to access the login area of your chapter website:
1. Through the direct link http://chapternumber.mophaz.org/wp-admin. (e.g. http://2560.mophaz.org/wp-admin)
Chapter 442: http://442.mophaz.org/wp-admin
Chapter 472: http://472.mophaz.org/wp-admin
Chapter 572: http://572.mophaz.org/wp-admin
Chapter 691: http://691.mophaz.org/wp-admin
Chapter 790: http://790.mophaz.org/wp-admin
Chapter 793: http://793.mophaz.org/wp-admin
Chapter 1958: http://1958.mophaz.org/wp-admin
Chapter 2560: http://2560.mophaz.org/wp-admin
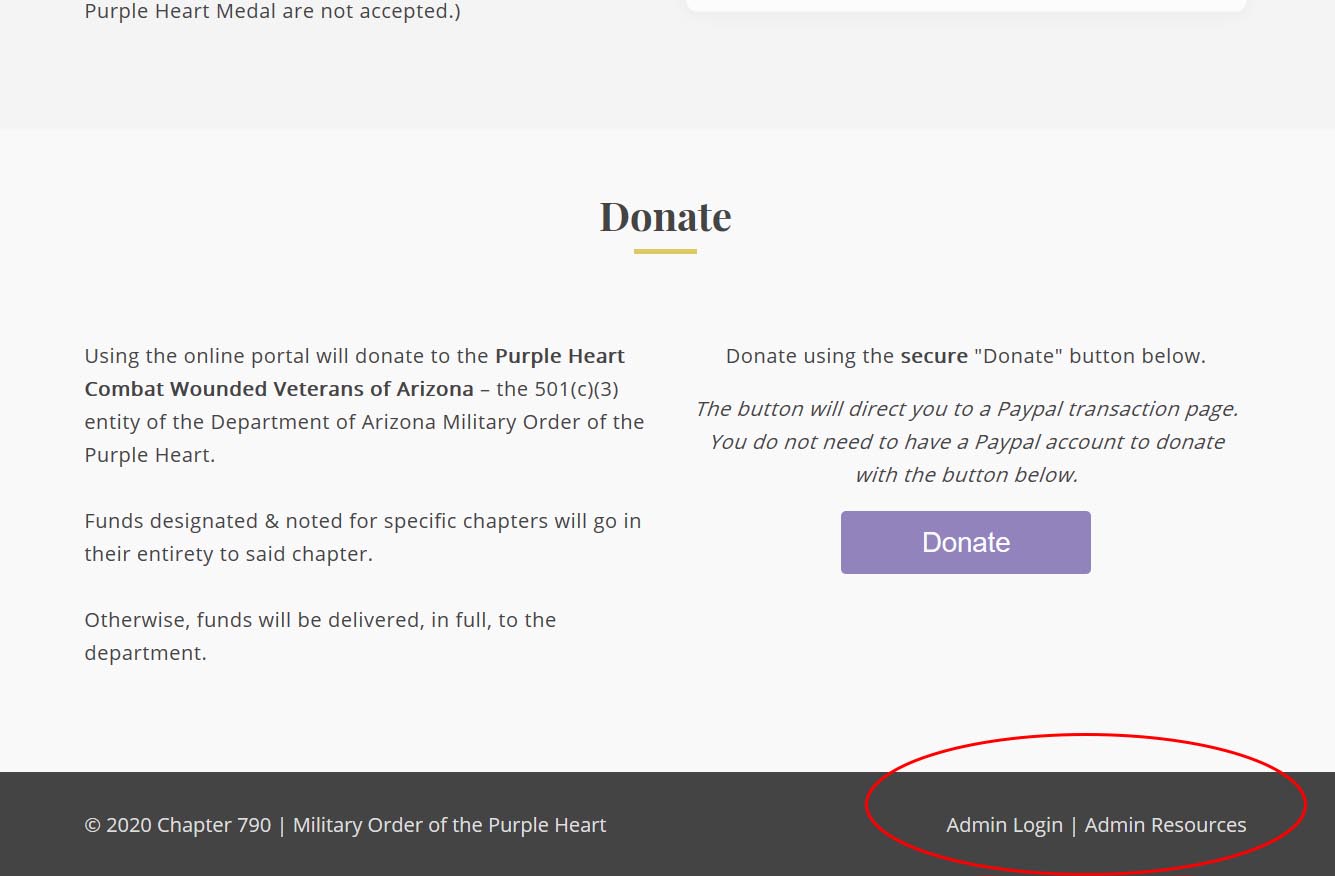
2. At the bottom (footer) of the chapter website through the link Admin Login. (Pictured below)
3. At the bottom (footer) of the department website through the link Admin Login. (Pictured below)

From there, you will land on the login page.
– Your admin username is adminyourchapternumber (e.g. admin793)
– If you don’t know your password, contact either the department web master or department adjutant.

Editing Existing / Creating New Page Content
There’s plenty to cover here, and the following guide is helpful, and will guide you in managing your chapter’s site:
https://www.wpexplorer.com/guide-to-gutenberg-wordpress/
This will cover:
– Titles
– Paragraphs
– Font styling (bold, italicize, underline, etc.)
– Images
– Custom blocks
– And more
Another article covering the same content (sometimes different wording helps material click better): https://www.shoutmeloud.com/tutorial-use-wordpress-gutenberg-editor.html
MOPH Theme CSS Classes
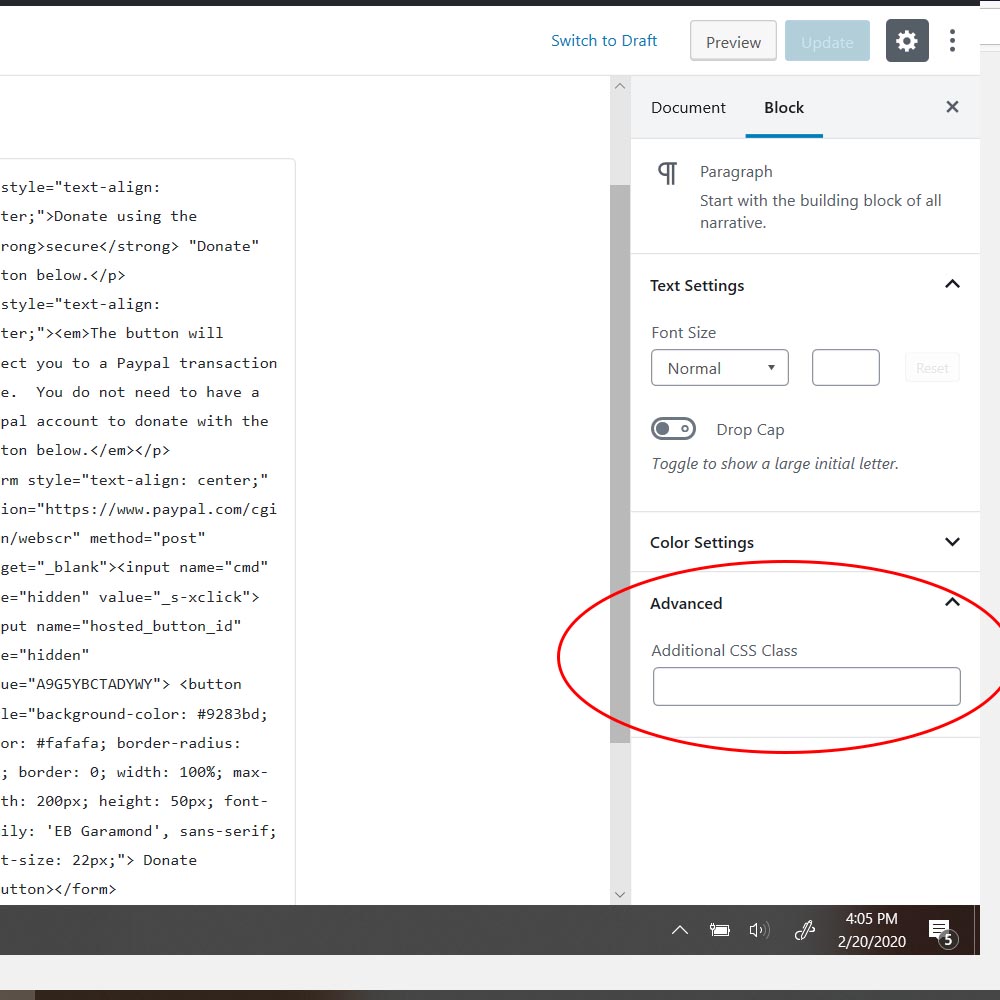
As was covered in the guide, special “classes” can be added to blocks or elements in WordPress / Gutenberg. Below are the current classes you can use to create special MOPH themed blocks or elements.
Colored Text Classes
Purple Text: color-purple
Yellow Text: color-gold
Red Text: color-red
White Text: color-white
Black Text: color-black
Button Classes
Ghost Buttons
button-ghost-purple
button-ghost-gold
button-ghost-white
button-ghost-black
Filled Buttons
button-purple
button-gold
button-white
button-black
Special Font Class
Script text for MOPH Slogan : Slogan
Drop Shadow Classes
Regular shadow
Class: drop-shadow
Extra Dark Shadow
(when used over dark backgrounds)
Class: drop-shadow-dark-bg
Shadow Box Classes
This will create a box for content (text, images, etc.) to be placed in. It’ll have a white background and shadow around the edges.
Regular Shadow Box
Class: shadow-box
Dark Shadow Box
(when used over dark backgrounds)
Class: shadow-box-dark-bg
Editing the Department Website
Brick Locator Tool
Adding an entry:
Step 1: Download the zip folder containing the plaza diagram here. (This will add a visual component to the tool, which will be added later on.)
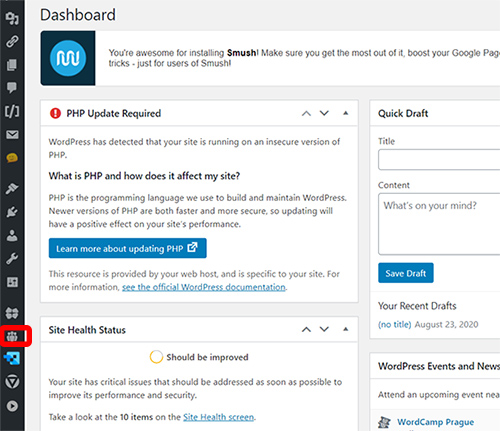
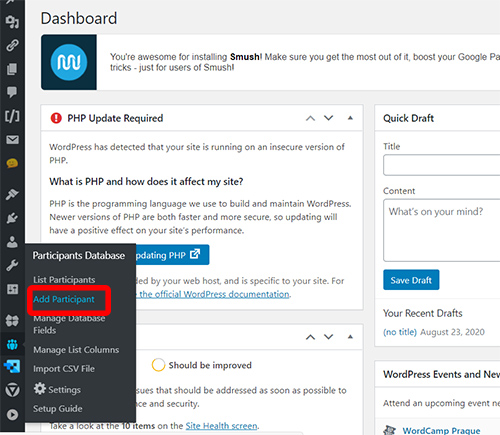
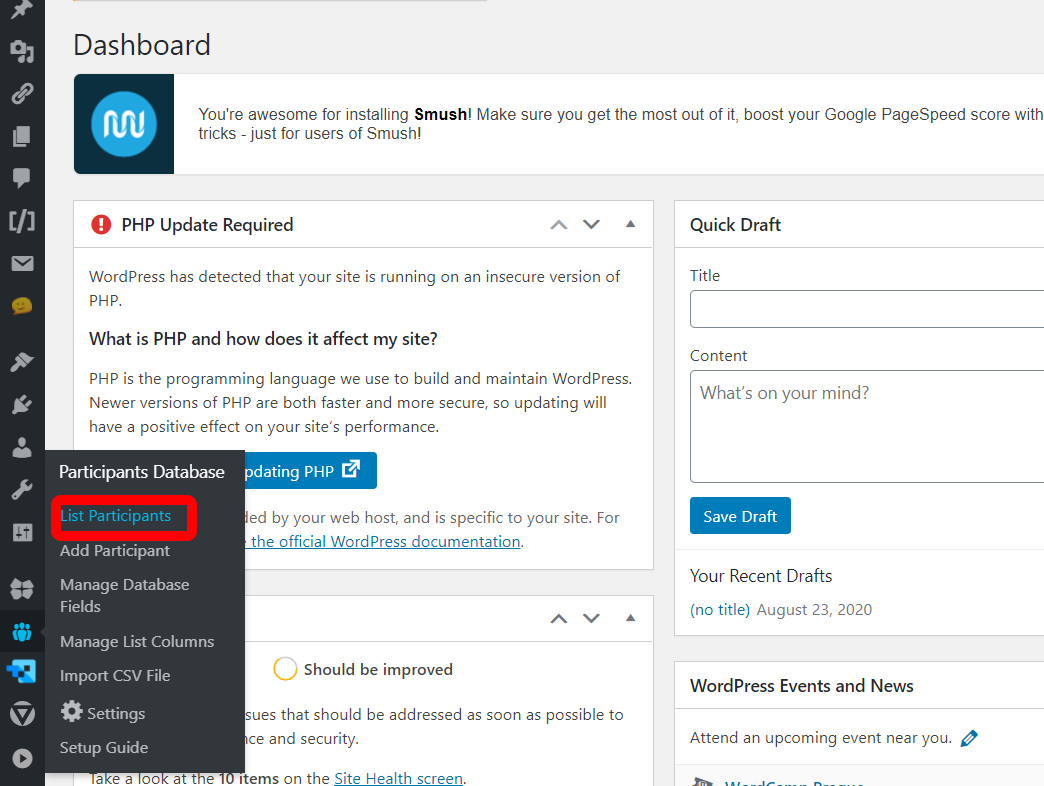
Step 2: Locate the Participants Database plugin (pictured below).
Step 3: Click Add Participant.
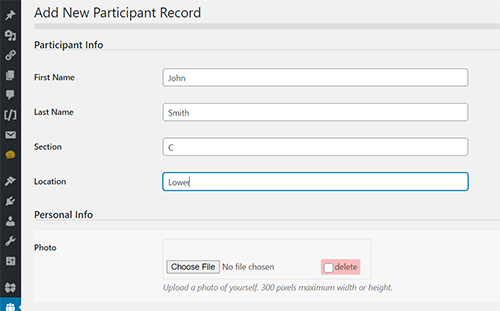
Step 4: Fill in the brick information. This will include a first name, last name, section, and location.
For organizations, such MOPH, DAV, etc. use the chapter number for the first name, and MOPH (if Military Order of the Purple Heart) as the last name. Look up the name on the tool itself for a reference (http://mophaz.org/brick-locator).
The sections are either A, B, or C.
The locations are either upper, middle, or lower.
Step 5: Add the corresponding image diagram that you downloaded earlier, by clicking the choose file button.
Then, select the image to upload, and click the open button.

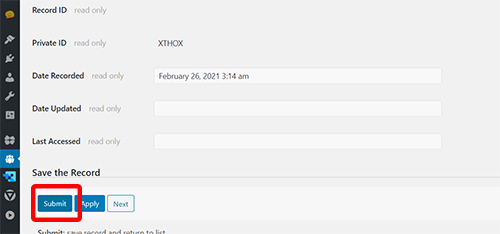
Step 6: Click the submit button. (You might need to scroll down to see this button.)
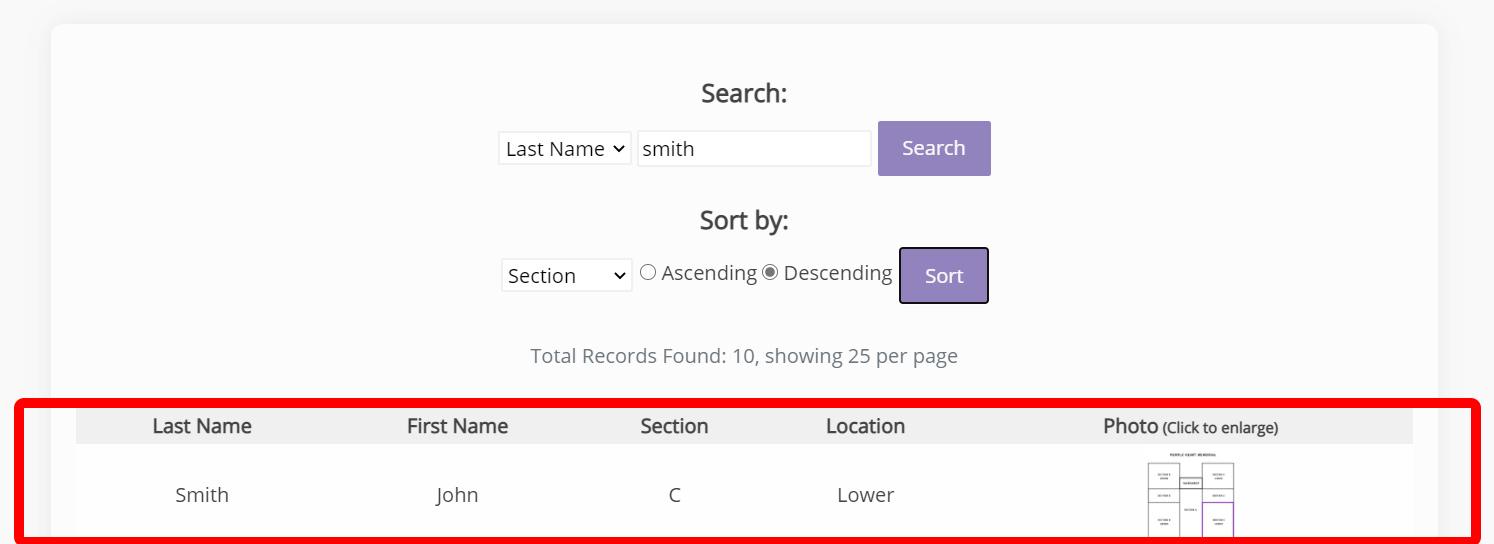
Step 7: Go to the brick locator tool, search the name you just entered, and double-check all the information is correct.
(http://mophaz.org/brick-locator)
Editing an entry:
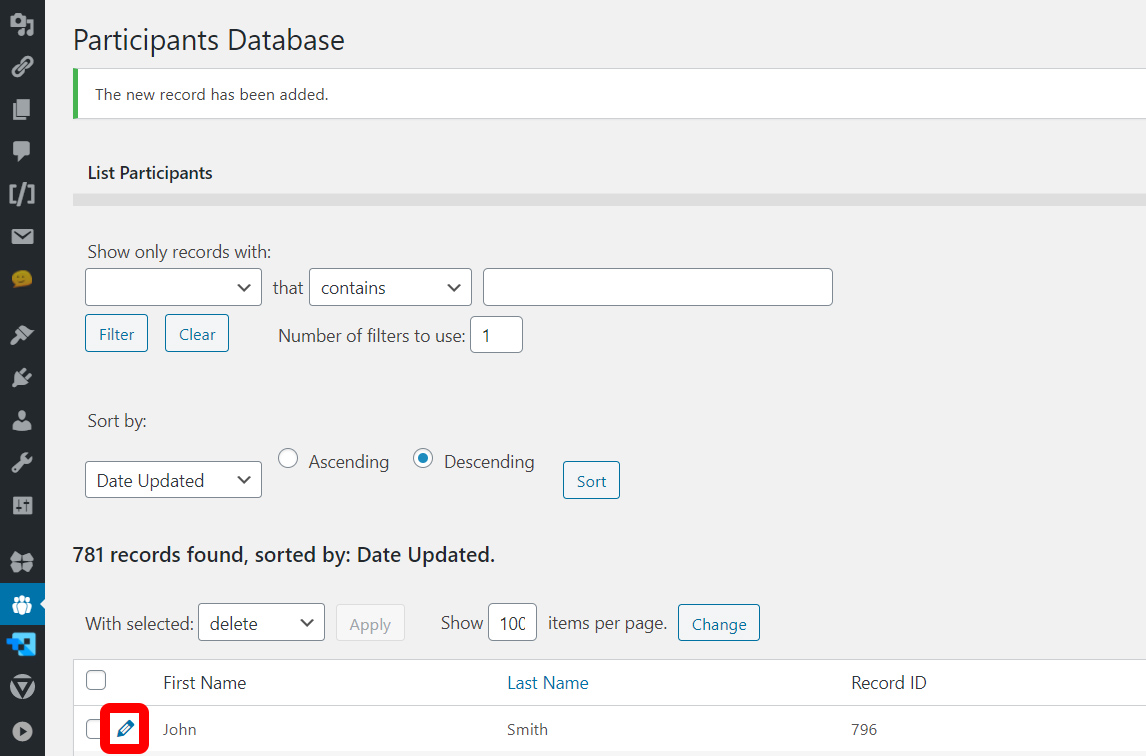
Step 1: Locate the Participants Database plugin (pictured below).
Step 2: Click List Participants.
Step 3: Use the search tool to find the brick you’re looking for. You can search by first name, last name, section, or location.
If you are unsure of the correct spelling, you can do a partial name search as well.

Step 4: Click the pencil icon next to the name that you wish to edit.
Step 5: Click the data field you wish to edit, and make any necessary changes.
Step 6: Click the submit button. (You might need to scroll down to see this button.)
Step 7: Go to the brick locator tool, search the name you just modified, and double-check all the information is correct.
(http://mophaz.org/brick-locator)
Deleting an entry:
Step 1: Locate the Participants Database plugin (pictured below).
Step 2: Click List Participants.
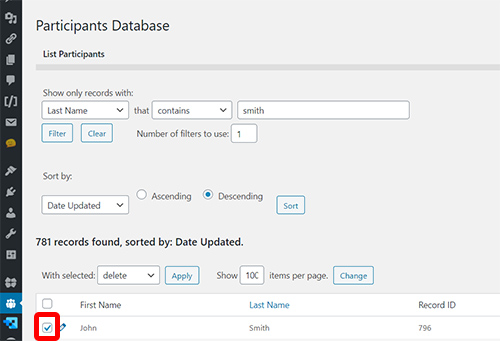
Step 3: Use the search tool to find the brick you’re looking for. You can search by first name, last name, section, or location.
If you are unsure of the correct spelling, you can do a partial name search as well.
Step 4: Click on the checkbox to the left of the entry.
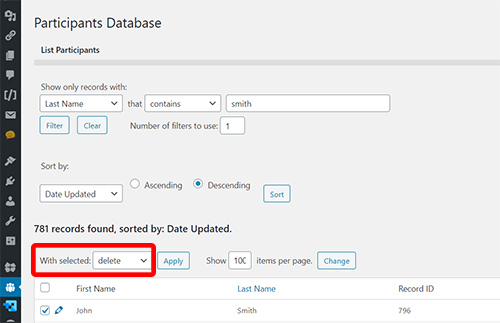
Step 5: Just above the record listings, above the label First Name, will be the words With Selected. To the right of those words is a select dropdown menu. Click it, and select delete.
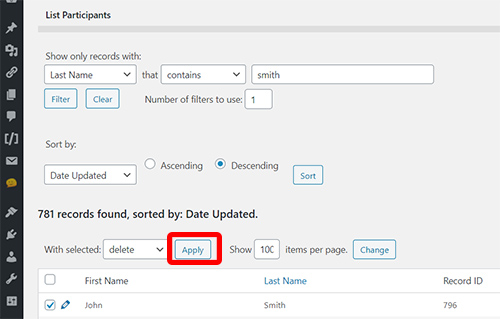
Step 6: Click the button to the right of the dropdown that says Apply.
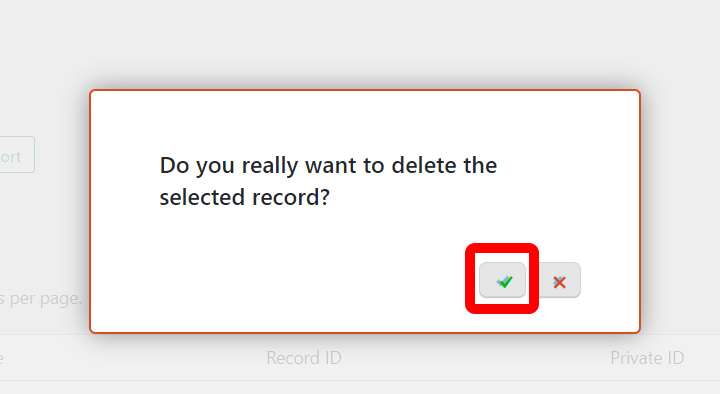
Step 7: A dialogue box will open asking, “Do you really want to delete the selected record?“
Click the green checkmark button.
And then, the entry will be removed from the database.